"A good moto/owner relationship is measured in stories per mile, the better the ratio the more you love the bike. This incident is just bringing the two of you closer together."

I shared this belief of my own with a friend of mine who is going through a post-track day-crash rebuild a couple of weeks ago.

As someone who bought my first bike in March of 2003 (a 2002 Suzuki SV650s)...

...and then kept it for nearly a decade I do truly come from a school of thought that believes that you can build a relationship with a bike. For me, I value knowing each and every nuance of a bikes character over having the latest and greatest technological showpiece.

The FZ and I are still quite early in our relationship. I bought it her on June 29th last year but I would say that if I continue on the solo-moto path that I will easily rack up a better story per mile ratio than the SV and I ever had.
When I first bought the FZ there were a few obvious issues with the bike. The dent in the tank was the most obvious there was also a tear in the seat which had been repaired with some sort of bonding agent and a few other cosmetic nits that could be picked. The previous owner did disclose that as some point he felt that the steering stem bearings might need to be replaced. At first I didn't notice anything that would suggest that sort of work needed to be done. Having already gone through this with my SV I knew what bad steering stem bearings feel like but as my California solo-moto adventure has been progressing I started to notice some shuddering being transmitted to the handlebars on low speed braking. Further on along the timeline this would be accompanied with a noticeable slight shift forward for the handlebars as if there was a pivot in the steering stem allowing some front to back movement of the front end as well as some clunking when going over larger bumps. I knew it needed to done and was putting it off but one day on the way to work after the MotoGP trip I took my hands off the handlebars at the same time to adjust the zipper pull on my jacket and noticed that the bike would develop speed wobble if I let go of the handlebars. That was the last straw; I was finally going to have to deal with it. I set about the internet and bough the necessary parts which included some new parts for to make my Pit-Bull rear stand compatible with the FZ's swing arm which did not have rollers for a rear stand.
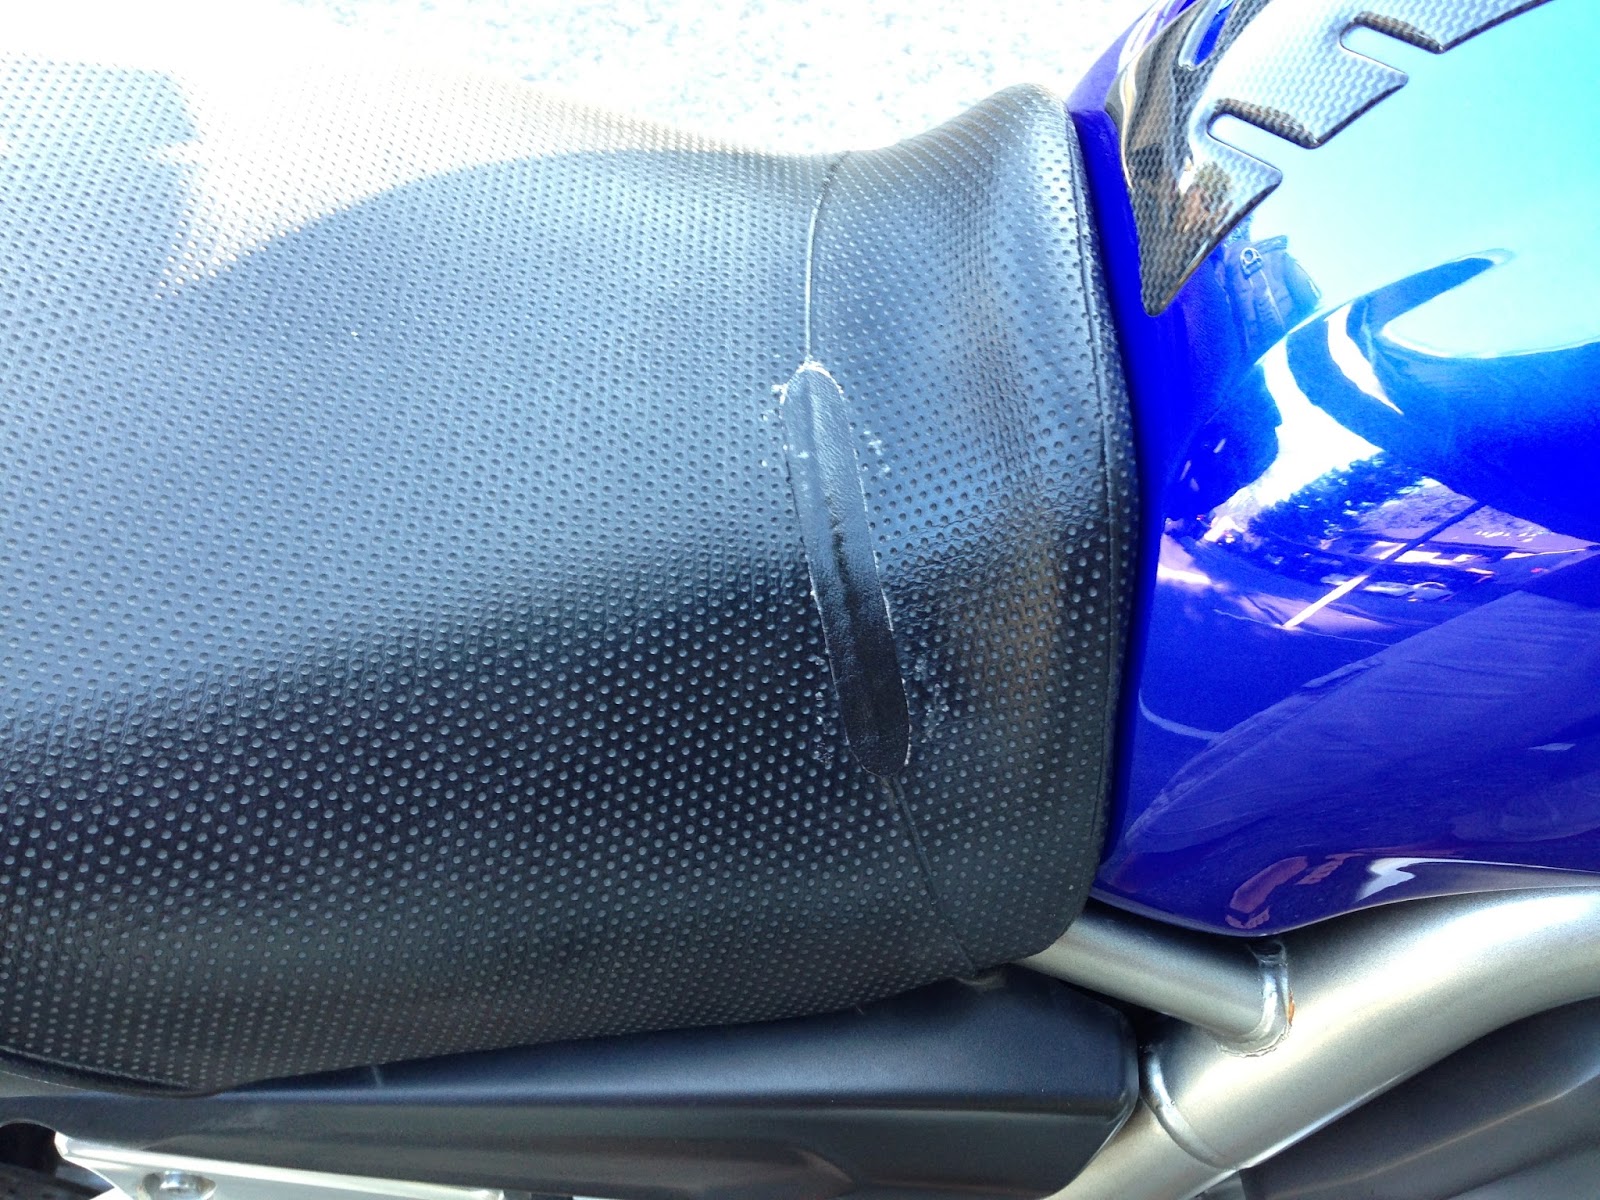
While that stuff was on the way I decided to address a cosmetic issue that had developed over the previous weeks before it got out of control. The seat repair that the previous owner had done had given out and the tear was back. I decided that I would do my best to make a permanent repair.


The first step for me was to pull the cover off the seat and get a good look at what was going on with the cover. That meant getting out the needle-nose pliers and doing a lot of pulling.

It turns out that it was a good thing that I did because to the right of the tear in question I discovered another portion of the same seam had a portion that was about to tear as well!


The next step was to stitch up the offending areas with some strong threat. In my case the strongest stuff I had had was red. No matter it wasn't going to be visible when I was done anyhow.

This was the product recommended to me by the ladies at Jo-Anne Fabrics (BTW if you're an an adult male and you want to feel the most out of place possible I suggest a run to Jo-Anne Fabrics) it is a fabric and leather repair that basically bonds to the material to be repaired and the patch medium which then combine to form some sort of super bond. The patch and the glue get applied to the inside of the seat cover.

The next step was to glue some of the same material I that the seat was made of (which I also found at Jo-Anne Fabrics) to the outside of the seat using Gorilla Glue. The excess glue you see in the above pictures is already wearing it's way off. Time will tell how well the Gorilla Glue holds up, thus far it is doing a good job of it.

The reason that I didn't rush right into the job at the first telltale signs of the problem was that it's a lot of work to replace your steering stem bearings. Specifically if you are going to attempt to do it in a shade-tree type environment. Using the race stands are out since the front stand has a pin that goes right into the hole of the steering shaft at the bottom of the triple clamps so you can't very well take out the triple trees if there is a stand underneath it with the weight of the bike pressing down onto it.

You need to be able to suspend the bike from it's frame high enough so that you can lower the triples out of the steering stem headstock. If you have a garage with exposed rafters I have heard of people throwing a "come-along" over the rafters and suspending the bike that way. I have also seen pictures of an industrious shade-tree-er that filled a cooler with bricks, put the cooler behind the rear wheel and then used a ratchet tie-down to from the rear sub frame to the handles of the cooler. This kept the bike from tipping forward on it's center stand when he took the front wheel off and then removed the rest of the front end. So there are many ways to come at this task.
When I first had to do this job on the SV I was living in an apartment as well so I didn't have a garage and that is when I came up with my bike hoist solution. I used pipe to make an overhead lift that would allow me to lift the motorcycle from the frame with ratcheting tie downs. Thus far it has never failed me and the FZ is definitely the heaviest bike that I have had on the hoist. So naturally I had some apprehension when I was beating the bottom race out of the headstock with a five pound hammer, but I am getting ahead of myself. I don't really want to go into too much detail with how I made the bike hoist for fear of liability if someone has a motorcycle fall on them so let me add this disclaimer, that should you decide to make your own that you are doing so AT YOUR OWN RISK and that my results may not be replicable.

So the basic process to take the front end off the bike is:
-Removing the fairings (possibly not necessary)
-Remove the front brake reservoir and lever from the handlebars (this way you don't have to bleed the brake lines
-Remove the handlebars
-Take off the top triple clamp
-Loosen the jam nut and then the retaining nut below the jam nut
-Hoist the bike up however you choose to do so.
-Remove that retaining nut and the front end should just lower itself down (be ready to catch it so it doesn't roll away on you if you decided to keep the front wheel on (I did)


Once I got the front end off the upper bearings were resting in the headstock and the lower bearings were on the steering shaft with the front end. I removed the upper bearing revealing the race. For the uninitiated; a bearing race is a hardened precisely-machined steel ring that ball bearings or roller bearings (hard steel as well) will seat into and roll along. They are such a precise fit that they need to be pressed into the softer headstock and are held there with only the pressure from the tight fit. I used a five-pound hammer and a large round steel punch to inch the old races out of the headstock. Even if I had chosen to use a new ball bearing set I would have had to pound out the old races and replace them as there is no telling what was actually worn in the old set.
When I did the steering stem bearings on the SV I upgraded the ball bearings to tapered roller bearings and was so happy with the results that I knew that I would always look to do that upgrade whenever the opportunity presented itself. So there was no question when I knew I was going to be doing the FZ's steering stem bearings I knew I would be putting in tapered-roller bearings and I knew they would be All Balls Racing brand (the product I have experience with from my SV install).

After removing the outer bearing races from the steering stem I had to focus my energy on getting the lower bearing race off of the steering shaft. The top one is simple as it's not pressed on the shaft just slides out of the top inner race when you lower the front end out. But the lower one was a pain in the behind when I did the SV and it wasn't much better when I did the FZ. Not having access to a torch that would heat up the inner race enough to expand it I used the same method I did in the past. I use a hardened chisel and the hammer to slowly work my way around the contact point of the race and the bottom triple clamp until the race works it's way up the steering shaft and frees itself. It's a tedious process and it mucks up the lower triple clamp a bit but nothing some time with a file can't make better.


After that it's just a matter of pressing in the new bearing races on the headstock. I laid the same chisel across the race and hit the chisel in the center rotating it until the race was flush with the headstock. But you have to seat the bearing which means pressing it in past flush which for me meant careful blows around the outside of the race with the large punch I used to remove the old races from the headstock. THIS MUST BE DONE CAREFULLY because if you score the inner portion of the race you're bearings will destroy themselves eventually. You will be able to feel a difference when the bearing is seated s you are hammering it down. I did the top first and then got under the bike and did the lower one.
I know in the video I said I was going to take an "after" one but I never got around to it but I have to say that while you wouldn't think that something as simple as bearings would make a big difference I can tell you they do. The front end feel is completely different, in a good way! More of the interference from the road is transferred to the frame and not my hands and the turn in is much surer and the bike feels a lot more planted. Not a bad upgrade for $32 for some bearings and 6 hours of my time.
Well folks, that actually brings you up to date with what I have been up to moto-wise, I did replace the brake fluid and bleed the front brakes this weekend but I did it really quickly and didn't take any pictures or generate any content but that is pretty self explanatory. I hope the readers enjoyed reading the update and perhaps found some of it useful as well! Stay tuned for my next update!
No comments:
Post a Comment