
So back in mid-November I set a goal to drop down to 190lbs. I don't think I have been that weight since before high school even at my most fit I have always been comfortable at around 205lbs but I want to see how hard it would be to reach and maintain the 190lbs. It's not that it would be odd for someone my height to weigh 190lbs technically... If you give the Body Mass Index any credence (which I don't) I should be at 180lbs to be fully "in-spec." According to my scale that measures the % body fat, % hydration and BMI when I weighed in at 200.6 lbs this week (yay almost 15 pounds gone) I was at 19.6% body fat that would meant that I'm carrying around 39.3 pounds of body fat that. So losing the next 10 pounds (of all body fat) would put me at 15% body fat which I think would be sustainable with the level of activity I am at. In the back of my mind I am am setting a stretch goal of hitting the 180lbs and 10% body fat, we'll see how that goes that level of fitness may require too much time and effort to be sustainable I don't want to live in the gym and I don't want to have to say no to every sweet, glass of wine, pint of beer that crosses my path either.
I will say that I am feeling the effects of being on the better side of the fitness spectrum. Last week I did four strength training days three of which I ran 2 miles in the process of and one of which I ran three miles in the process of. On top of that I ran a 6.5 mile run one day and my first 10 miler since I have started this process on another day!

The real challenge is going to be keeping up a similar level of activity once I delve into our 12-hour shift rotations that my co-workers voted into place last year. I start my first set of 12-hour shifts this week with a run of four night shifts. I'm pragmatic about the switch... I definitely felt like I was always at work while working the rotating 8-hour shifts but it was much easier to find the motivation to do other things on a work day with that extra four hours of free time to yourself. It just takes a different level of focus to force yourself to work out on those days when you'd rather lay around after working for 12 hours. For myself "work" means being sedentary, sitting in a chair and thinking really hard so it's not a physical tiredness it's more that you're mentally drained and you're body is entrenched in that lethargic static state that you really need to harness your mental motivation to bust yourself out of not the easiest task when you're brain-tired.
I have experience with this before, my previous job was 12-hour rotating shifts and I was able to complete the P90X program and that takes a lot more time and intensity than the routine I am on right now and getting results with. So I know that I am capable it's just a matter of the execution now. I am confident I can reach the 190 and we'll see about the 180.
So that's the non-moto Juan update...
In solo-moto Juan terms things have been going pretty well. There are times where I do really miss having a car, but they don't hang around too long. When I am on the bike it always puts a smile on my face and I did add a little extra comfort to the FZ this last Saturday. I installed heated handgrips on the bike. Truthfully it's not necessary for the short ride to and from work but I can tell that if I was to go on a longer ride in the sub 40s that I my gloves would not be enough protection from the cold.

I actually bought the Trackside Grip Heater kit back on Dec 6th at the Cycle-gear store in Fairfield as an impulse buy of sorts. I've written about my experiences at this store in the past and suffice to say I don't hate the place but I don't like it either, I nothing the place. But the day before we dipped into the mid 20s overnight and that morning the FZ's battery did not have enough juice to turn the engine over. No big deal I was able to push-start the bike relatively easily that day. It's just like any older battery they start to show their age when the temperatures drop. I had hoped that when I rode the bike that it would get enough charge back into it to limp her along until it got warmer and when I left work that day the bike did start with a little effort. I figured by the time I got home it would be good to go the next morning.
WRONG! Once again we had a mid 20's night and once again the bike did not want to start this time the relays just clicked there wasn't even enough juice for the starter to even attempt to turn the engine over. So for those who ride all year 'round it goes without saying that if you are riding your super-standard motorcycle in the sub 30s you are wearing pretty much all you gear. I bring that up because while that is fine and dandy when you hop on your bike thumb the starter button and go. But after the fifth failed attempt at push-starting your bike you are sweating your ass off under all of those layers. Add to that the frustration of trying to throw your leg over the moving bike without kicking the bags and ending up under the bike it's not the best way to start your day. Thanks to my poor Wife (who had to deal with a tirade of profanity directed at my bike) and my obvious agitation I was able to jump start the thing and get to work on-time but that was enough. At this point in my life there's no reason to try and "limp along" a dying battery until it gets warm again I decided that after my shift I would be heading directly to the nearest cycle shop (Cycle-gear) and buying a new battery. Of course that day was the day it decides to rain and rain hard. Undaunted, after my shift I got on my drenched bike with all my gear and headed to Fairfield. The gear did it's job and I stayed perfectly dry so that is a good thing. It was about 40 degrees which with the rain and wind was enough to remind me that I should look and see about heated handgrips while I was there.
Seeing that the grip heater kit was only $29.99 I grabbed one while I was buying my $112 battery. By the time I got back on the road it was dark and still rainy and the traffic was stop-and-go heading from Fairfield to Vacaville so I got my first taste of lane splitting on a 4-5 line highway, in the dark, in the pouring rain. Truthfully I felt much safer splitting than I would have in an actual lane stopping and going with the cars. I kept my pace to roughly 10mph faster than the cars and kept my head on a swivel and made it through none-the-worse for wear. The next day I installed the new battery but didn't find the motivation to attack the hand-grips.
I did make one attempt a few weeks later but had no luck at getting the stock handgrips off and I gave up that day. I feared that if I did manage to get them off that were the odds that I would be able to get them back on with they slight increase in diameter that the heaters would add? Plus I was worried that I would need a compressor to get them off which I didn't have so they sat and waited for an increase in motivation. So this last weekend I did a little research and found a youtube video of a guy with a Gen II FZ who was able to get the handgrips off with just a heat gun (which I did have) that was the inspiration I needed.
I went back to the cycle gear and bought a set of Pro-grip handgrips in case I couldn't get the old ones off (I'd just cut them off) or I did get them off and they wouldn't go back on I'd have a new softer set to try and put on.

I was able to heat up the grips enough to soften the glue and pull the grips off the bars with a lot of effort in the twisting and pulling department. I did the same as the guy in the video I applied heat directly to the grips until I could see a little bit of shine on them from the heating then I switched to blowing the heat into the bar itself alternating between these two for a couple of minutes taking extra care when pulling the throttle side off so as not to damage the throttle tube.

You want to be mindful with this kit of the fact that the wire leads are just soldered to the heating elements so you don't want to have too much of a bend in the wires lest over time the soldered connection breaks. You can see that the clutch-side I have mounted it pretty close but since this one is stationary (no twisting) I figured it would be okay.

The throttle side I mounted the heater a little more outboard so there wasn't such an extreme angle at the soldered connection.

Wiring up the kit wasn't very clear with the instructions provided. I wired mine into the positive and the negative wires going to and from the right side-marker light in the headlight cluster the same strategy I used when wiring up the accessory socket to the left side-marker.

I placed the switch fore of the accessory socket on the left-hand side inner fairing. You are able to tell what side of the three-position switch is the high and low by placing the hi-lo plate on the switch there is a key/slot on the threaded portion so you can tell which way to wire the switch. My kit did not come with an extra female spade connector to connect the two of the terminals to the shared middle male terminal so I just soldered them to the terminal but you may want to check your kit if you decide to buy one of these to see if yours comes with one and perhaps buy one if you don't want to solder the ends onto the switch. The kit also made a point to mention that you shouldn't place the ceramic resistor on anywhere that would be heat sensitive so I used some zip ties on the wires entering and exiting the resistor and attached it to the metal portion of the fairing stay that in my mind would get enough air flow to dissipate the heat and keep it away from any other heat sensitive wiring. Other than that it was just a matter of making sure your wire routing does not conflict with the moving of the steering components and cutting away some of the sheathing on the positive and negative wires going to the side markers and soldering the other wires together. All of the wires are black in the kit so make sure that you have the right ends going to the right places.


I decided to install the new handgrips. I ended up having to use copious amounts of grip glue to "lube up" the handlebars/grips enough to get them to slide on all the way. I would recommend either having an air compressor to ease them on or wearing some nitrile gloves for that part of the job because all that extra glue ended up on my hands and I had to spend a lot of time at the sink with the acetone to remove the dried (basically krazy) glue.
I am happy with the end result and so far have found that the best way to use them is to get them started on the hi setting and then adjust them to the lo setting once they get to the desired temp. I normally ride covering the brakes and clutch with two fingers though so those two fingers still get cold. If I were on a longer highway ride I would probably just hold onto the grip with my whole hand if the traffic was clear to keep warm. It wasn't that bad of a project, I think I spent a total of 3.5 hours to get them installed and working.

In my last update I teased that I would cover my new seat cover install. It's been a while and I almost forgot I did it. A member on FZ1OA suggested I try an HT-Moto Custom Seat Cover when I had mentioned the idea of buying a new stock seat. I realized that my previous repairs to the seat, while holding did not do enough and that other parts of the same seam were starting to fail due to age and brittleness of the seat cover material. The new seat cover only cost $80 and I figured I'd give it a shot. The results were outstanding and I can't say enough about the quality and finish. But you can see for yourself...
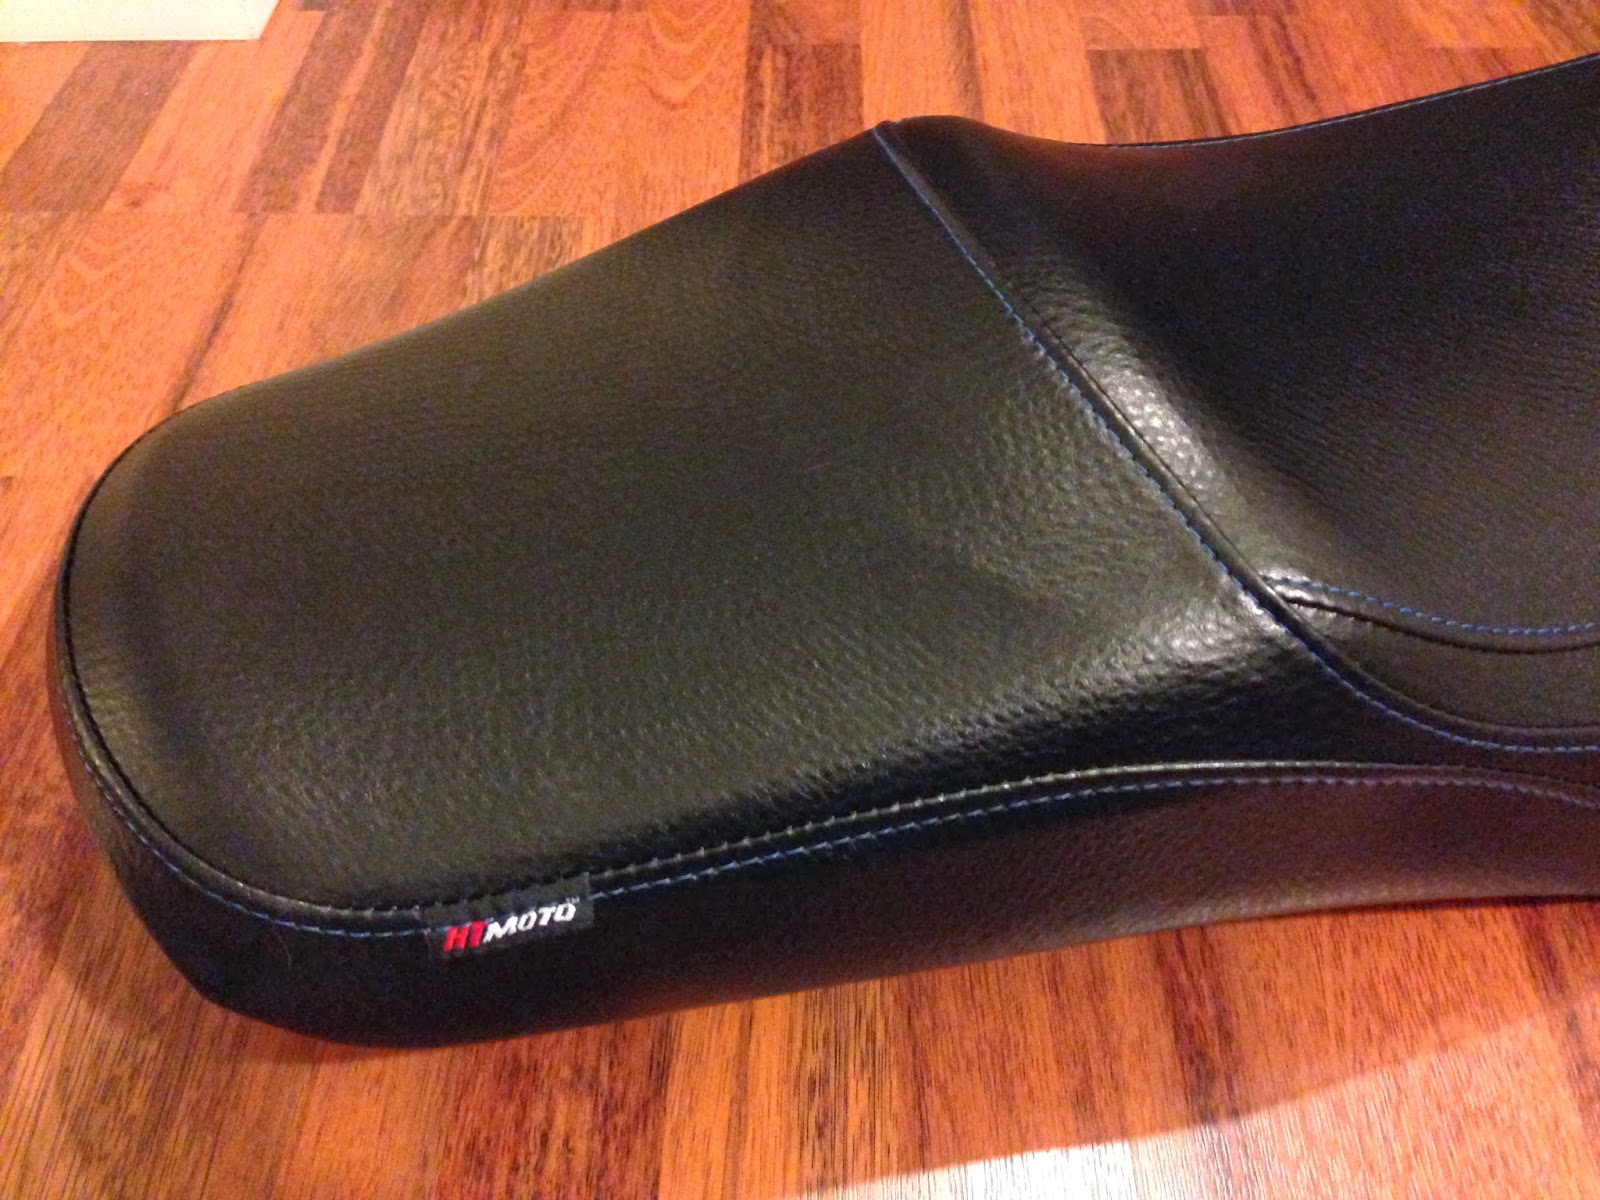


All you do to install it is stretch the new cover over the existing cover (their recommendation) and staple as you go pretty darn easy.
That's the moto-update for now. I hope to have something more interesting to share moto-wise with you on the next update. Thanks for checking out the update none-the-less. Until next time...


